But both of the John's who own Pico are gaming buddies of mine and distinguished gentlemen who I like a lot and wanted to help out. I'm also a huge nerd in general, so I read up about the wargaming community, social marketing, and brought to bear some experience with communications strategy and online campaigns, and thus we started flying the plane and building it at the same time with the new Pico armor website and community.
Alrighty, let's get to what we pulled together and painted for Nina's Army of (Social and Economic) Justice yesterday! We did this rather quickly because we're trying to beta- test a Roll20 platform complete with terrain tomorrow - so those of you who will cry "foul!" - please note a few things: 1) I did actually paint a whole bunch of crap with the Johns last fall - it was my "trial by boredom" intro to wargaming; 2) We did do a lot of basing yesterday, and in the interests of posting this in a timely fashion, the Johns' were gracious enough to finish a final stand of infantry and my 5 stands of heavy artillery.
Some of you might find my walkthrough painstakingly basic, others might sigh in relief that I asked all the random questions I did. Anyways, this is my blog so I'll be as obvious as I want :)
So here is what we landed on for my $21 - which equals 30 stands of which you usually put three minis per stand (kinda):
- 5 stands of tanks - t34-76s - I guess I'm building a kind of Soviet set
- 5 stands of infantry
- 5 anti tank guns
- 5 heavy weapons - mortars and machine guns - I asked John why I needed this versus more tanks which I wanted and he said this provided more punch for the infantry.
- 5 ba20s - or bt7s - I forget - anyways, light tanks keep away bad guys and are more maneuverable
- 5 artillery - shoots high explosive indirect fire - which in other words keeps bad guys away, kinda.
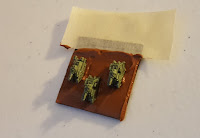
So, the really really crunchy bits? Mr. Siewenie showed me this high tech tool he uses to keep a thin strip of black paint on the back of his bases like this:
Seriously, see the fine hand-crafting of wood bits and sticks to make this machine that allows one to precisely lay a piece of painters tape across the black strip of each base to ensure clean lines and even spacing? zzzzzzzzzzzzzzzzzzzz.


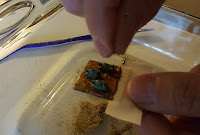
Next, fine pumice gel (otherwise known as non-edible Nutella) is the medium to smear on the base and then sprinkle flocking on top - I told Mssrs John and John that this is very high start up costs for just one individual to start on their own! I do wonder if there aren't "kits" that could be sold that have smaller amounts of this stuff to offer as a starter pack for people like me - if I didn't have friends who had stuff like this already, I'd NEVER get this done.
Let the schmearing begin!! As this was a really important step, I had to listen to John S. describe in PAINstaking detail how to cover the 1.5mm bases very carefully with the Nutella, to make sure it isn't too thick, something about watching out for "berming" and zzzzzzzzzzzzz.
So after I removed the Nutella from my forehead after it hit the table, he stepped away and allowed me to get to work, and it was actually quite fun and gratifying to see the little minis start to take shape on the bases and how the flocking (largely) covered up my haste in slapping on the nutella stuff.
My first ever base!! Yeaaaaaa!!! Wait, what? I have 29 more to go?? Boooooooooo.
After breaking out some port and Jamesons to celebrate getting me through my first ever basing project, this is what we finished up with, noting that I am still missing 5 stands of heavy weapons, and 1 stand of infantry.
 |
| Nina's (almost complete) Army of Justice |
Of course, if I can't get those troops ready to roll by tomorrow's beta test, I do have a secret weapon that is super fabulous and has many powers that will crush the enemies of justice and freedom:
 |
| Icarus, the Super Fabulous!! |
We'll post our after action report (AAR for those of you who just know these things already) on the boards. See you there!


